

Track lighting is a popular and versatile lighting solution for many homes. It provides directed light, allowing you to highlight specific areas and create a functional atmosphere.
If you're wondering how to replace track lighting, it's easier than you might think. With a few simple tools and the right approach, you can replace your old or damaged track lighting and give your space a fresh, updated look.
This guide will walk you through the steps of track lighting replacement, from removing the old fixtures to installing the new ones.
Gather Your Tools and Materials
Before starting your track lighting replacement project, make sure you have the right tools. You’ll need a screwdriver, a ladder, a new track lighting system, and possibly some new wiring components. If you're replacing just the track lighting head, you may not need to rewire anything, but it's always a good idea to check that everything is in good condition.
Make sure to turn off the power at the circuit breaker before you begin working on any electrical components. This is essential for your safety and will ensure there are no accidental electrical shocks during the installation process. Having the right tools on hand will make the process more efficient and reduce the risk of mistakes.
Remove the Old Track Lighting
The first step in replacing track lighting is to remove the existing system. Begin by unscrewing the track lighting head or fixture from the electrical box. If you're replacing the entire track, you’ll need to remove the track system as well.
Be careful when removing the track, as it may be connected to electrical wires. Use your screwdriver to loosen any screws holding the track in place, and gently pull the track away from the ceiling. Once the track is removed, make sure there are no exposed wires, and inspect the electrical box to ensure it's ready for the new installation.
Install the New Track Lighting System
Now that the old track lighting has been removed, it's time to install the new system. Begin by positioning the new track lighting system on the ceiling, ensuring it is aligned with the electrical box. The track should be securely attached to the ceiling using the screws provided with the new system.
If you're installing a new track system rather than just replacing the track lighting head, you may need to attach the track to a mounting bracket. Follow the manufacturer's instructions carefully to ensure the track is installed correctly and securely. Once the track is in place, proceed to connect the wiring, ensuring the connections are tight and properly insulated.
Connect the Wiring
Connecting the wiring is an important part of the track lighting replacement process. If you’re replacing the track lighting head, you’ll typically only need to connect the new head to the existing wiring. For full track lighting replacement, you’ll need to attach the new system to the electrical box in the ceiling.
To do this, match the wires from the track lighting system with the corresponding wires in the electrical box: Black to black (hot), white to white (neutral), and green or bare wire to the grounding screw. Use wire connectors to secure the connections, ensuring they are tight and secure. Always double-check your work to prevent any loose or exposed wires that could lead to electrical hazards.
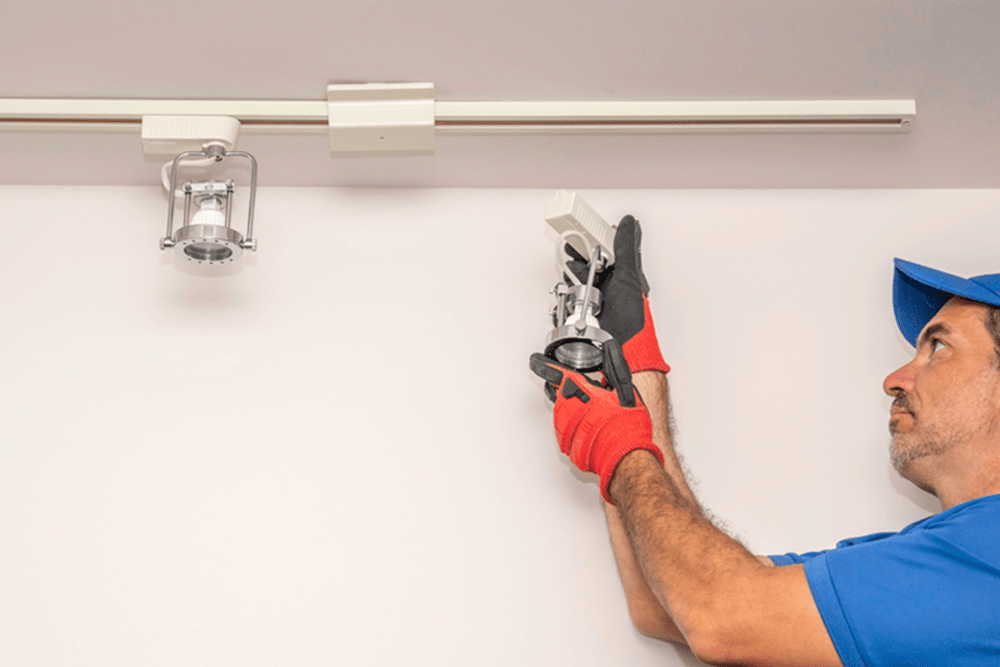
Install the Track Lighting Head
If you’re replacing the track lighting head, this is the next step. Simply attach the new lighting head to the track by inserting it into the track’s designated slot. Depending on the type of track lighting you have, you may need to twist or click the head into place to ensure a secure connection.
Make sure that the track lighting head is properly seated and tightened. Some track lighting systems use a locking mechanism to hold the lighting heads in place, so ensure the mechanism is engaged before moving on. Once the head is secure, adjust the angle of the light to your desired position.
Test the Lighting System
Once the track and head are in place, it’s time to test the lighting system. Turn the power back on at the circuit breaker and flip the switch to turn on your new track lighting. Check the lighting heads to make sure they’re working and directing light where you want it.
If you notice any issues, such as flickering lights or no power, turn off the power again and double-check your wiring connections. If everything is secure and the lights are functioning properly, you're all set with your new track lighting installation. Adjust the heads to ensure your space is well-lit and the light is distributed evenly.
Troubleshooting Common Track Lighting Issues
If you encounter issues during your track lighting replacement, it’s important to troubleshoot carefully. One common issue is the track lighting head not receiving power, which could be due to a loose connection. Ensure the wires are securely connected to the track and the electrical box.
Another issue could be flickering lights, which can be caused by a faulty bulb or an improper connection. If you suspect the issue is with the track lighting head, try replacing the bulb and checking the connection to the track. If these steps don’t solve the problem, you may need to consult an electrician to ensure the electrical box and wiring are intact.
Enjoy Your Updated Track Lighting
Once your track lighting system is properly installed and working, take a moment to admire your work. Track lighting replacement can give your kitchen, living room, or any other space a modern, sleek look while offering customizable lighting options. Adjust the track lighting heads to highlight specific areas or provide general lighting, depending on your needs.
If you're replacing a single track lighting head, you can experiment with different bulb types and angles to achieve the perfect lighting for your space. Track lighting is highly versatile, allowing you to change the direction of light to suit any task or atmosphere.
Light Up Your Space with New Track Lighting Today
Replacing your track lighting is a great way to refresh the look of your space while improving its functionality. Whether you’re replacing the track lighting head or installing a full new system, the process is manageable with the right tools and guidance.
For assistance with track lighting replacement or to explore new lighting options for your home, Sonic Electric is here to help. Browse our wide range of products, from LED lighting to electrical supplies, and more.


Share:
8 Stunning Undercabinet Lighting Ideas For Your Kitchen
Electrical Prefabrication Explained: Benefits And Considerations