

Installing a circuit breaker may sound like a complicated task, but once you understand the basic process, it becomes much simpler. Circuit breakers play a vital role in protecting electrical circuits from overloads and short circuits. They automatically shut off power when there is an issue, preventing further damage to the system.
If you are upgrading an existing electrical panel or replacing a faulty breaker, following these steps will ensure that circuit breaker installation is done safely.
Get the Right Tools and Materials
Before you begin the installation, it is important to gather all the necessary tools and materials. Having everything you need within reach will help keep the process smooth. Common tools for circuit breaker installation include screwdrivers, a wire stripper, a voltage tester, pliers, and a flashlight for better visibility in the panel.
Safety gear such as insulated gloves and safety goggles should also be worn to protect yourself from potential electrical hazards. Make sure you have the correct circuit breaker type for your panel and the appropriate wire gauge for your circuit.
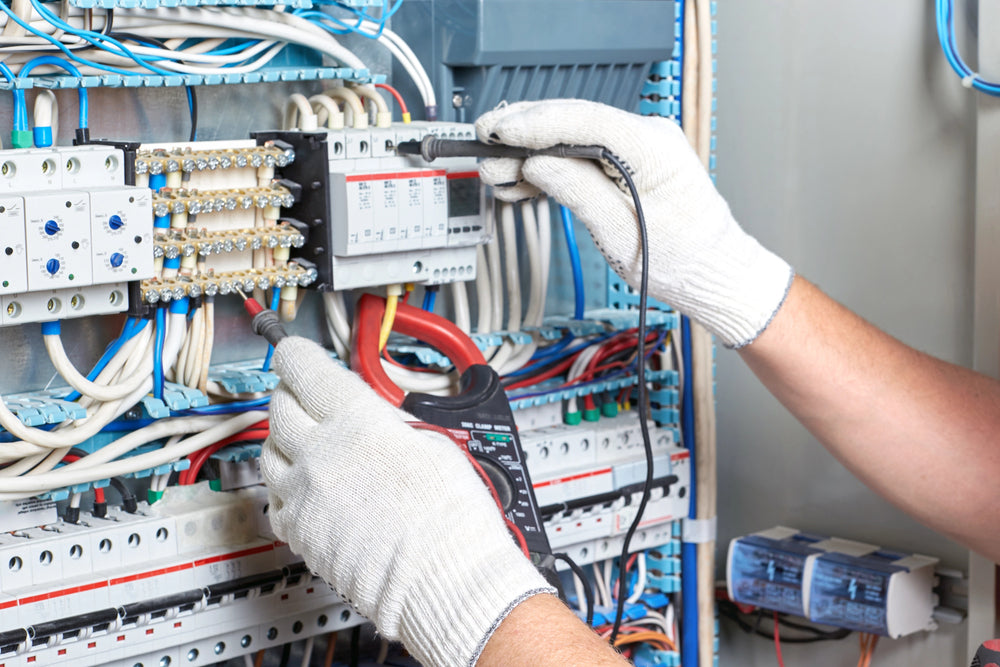
Turn Off the Power and Test the Area
Safety is the number one priority when working with electrical systems. Before doing anything, turn off the main power supply to your electrical panel. This step is non-negotiable and will prevent you from being exposed to live wires during installation.
Use a voltage tester to confirm that the circuit you are working on is de-energized. Even if you think the power is off, there may still be a residual current or other circuits that remain active. Always double-check with a voltage tester to make sure there is no electrical flow.
Remove the Panel Cover
Once the power is off and you have verified that there are no live wires, the next step is to remove the cover from your electrical panel. This will give you access to the circuit breaker slots inside. Make sure to set the screws aside in a safe place, as you will need them to secure the panel cover once the installation is complete.
If the lighting is poor inside the panel, use a flashlight to help you see clearly. Handling the panel cover carefully will prevent unnecessary damage to the components. Be cautious when handling the cover, as panels can have sharp edges, and dropping the cover can lead to damage.
Select the Correct Slot for the Breaker
Inside the electrical panel, there are designated slots for breakers. When installing a new circuit breaker, choose an available slot that corresponds with the amperage and voltage requirements for the circuit.
Circuit breakers come in different types, so make sure you select one that matches your system’s specifications. A single-pole breaker is typically used for 120-volt circuits, while a double-pole breaker is needed for 240-volt circuits. Once you identify the right slot, you can begin the actual installation of the circuit breaker.
How to Install a Circuit Breaker
With the correct slot chosen, it is time to install the circuit breaker. Insert the breaker into the panel by first aligning it with the bus bar inside the panel. The bus bar is responsible for providing the electrical power to the breaker. After securing the breaker to the bus bar, snap it firmly into place.
Make sure that the breaker is aligned properly and that it is fully seated into the slot. Improper alignment can lead to malfunction or inadequate protection of the circuit, so it is important to follow the manufacturer’s instructions to ensure everything is in the correct position.
How to Wire a Circuit Breaker
After the circuit breaker is installed in its designated slot, the next step is to wire it. Use a wire stripper to strip the insulation from the ends of the wires before connecting them to the breaker terminals.
Typically, the hot wire (often black or red) connects to the terminal on the breaker. The neutral wire (usually white) should be connected to the neutral bar in the panel.
Once the wires are connected, use a screwdriver to tighten the terminal screws securely. Loose or improperly connected wires can cause overheating, electrical arcing, or even fire, so it is important to ensure that the connections are tight.
- Test the Circuit Breaker
After completing the wiring, it is time to test the breaker to confirm that it is functioning properly. Turn the main power supply back on and use your voltage tester to check that the breaker is receiving power. Flip the breaker switch to the "on" position and verify that it operates smoothly.
If the breaker trips easily or shows signs of malfunction, it may need to be replaced or re-installed. For installations that include additional components such as auxiliary contacts or bell alarms, be sure to test these features as well to confirm they are working as intended.
- Reattach the Panel Cover and Label the Breaker
Once the circuit breaker has been tested and confirmed to be working, replace the panel cover. Use the screws that were set aside earlier to secure it in place. After the cover is reattached, it is a good idea to label the new breaker.
Proper labeling will allow you or anyone else working on the electrical system to easily identify the circuit that the breaker controls. This is an important step for future maintenance or troubleshooting. Clear labeling also helps ensure that future repairs or upgrades are quicker and safer.
- Ground the Circuit Breaker
Grounding is another critical part of electrical safety. When a circuit breaker is grounded, any stray electrical current is safely directed to the ground instead of posing a risk of electrical shock. In residential installations, the grounding wire should be connected to the ground bus bar in the panel.
If you are working on a commercial or industrial installation, check local electrical codes to ensure that the proper grounding methods are used. For extra safety, it is a good idea to verify that the wire gauge used for grounding is correct for the system's requirements.
Installing a circuit breaker may seem like a big task, but with the right tools and a little patience, it can be completed safely and efficiently. Whether you are replacing a breaker or upgrading your system, following these steps will help ensure that everything is done correctly.
At Sonic Electric, we are always ready to provide electric supplies and advice you need to make your electrical systems safe and reliable. Contact us if you have any questions or need help finding the right circuit breaker for your needs.


Share:
Understanding Rigid Connectors and Couplings: Threaded vs. Threadless
Understanding Malibu Electrical Outlet Boxes: New Work vs. Old Work Explained